 Step 2 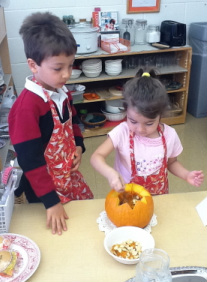 Step 3 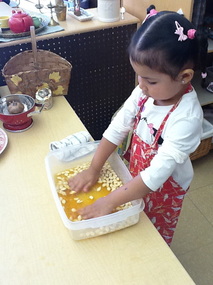 Step 5 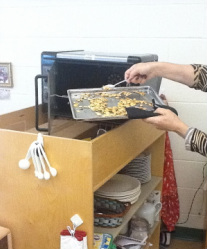 Step 9 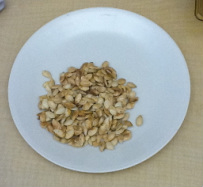 Step 10- Delicious, roasted, pumpkin seeds! |
Recipe #1 Roasted Pumpkin SeedsAn adult: 1. Turns oven to 350 degrees.
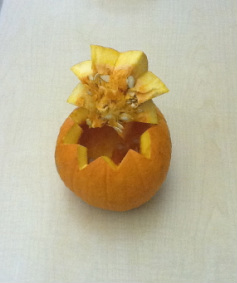
2. Cuts the top off the pumpkin. It is fun to make a zigzag cut so you can you can use the pumpkins as a Jack O'Lantern later. A child: 3. Scoops out all the seeds with a large spoon. The pulpy seeds go into a small bowl. 4. Picks out all the pulp from the seeds and put the pulp on a paper towel. 5. Rinses the seeds in a colander and drain. 6. Coats the seeds with oil. Put 1-2 Tablespoons of vegetable or canola oil in a bowl. Add the pumpkins seeds. With your fingers, get them all really oily. 7. Spreads the seeds evenly (no overlaps) on a baking sheet. 8. Sprinkles with salt… just a little….not too much An adult: 9. Bakes seeds for 15-30 minutes. Check after 15 minutes to see if they are brown. When they are brownish, they are ready… if not, give them a few more minutes. 10. Takes out roasted seeds and cools them. 
EVERYONE eats the tasty treat.
|
Recipe #2 Easy Pumpkin Bread Step 1: Ingredients
3 cups flour 2 cups sugar 1-cup vegetable oil 2/3-cup water 2-teaspoon baking soda 1-teaspoon salt 1-teaspoon cinnamon 1-teaspoon nutmeg 1/2-teaspoon ginger (ground) 4 beaten eggs About 2 Tablespoons of butter and flour to grease pans with 16 oz. can Libby's Pumpkin (not pumpkin pie filling) **See below about using a real pumpkin. ** You don't need an actual pumpkin for this recipe unless you want to be a serious baker. If you do want to use a real pumpkin, you will need to bake or steam the pumpkin meat first and then mash it before using it in this recipe. Step 2 Grease and flour pans Preheat oven to 350 degrees. Pan size~ 7in. x 4in. For any other size pan, the temperature and baking time may need to be adjusted. Grease and flour the pans. This makes sure that the batter does not stick to the pans during baking. This is a VERY important step to remember. Step 3 Dry Ingredients Mix all of the dry ingredients in a large mixing bowl. This includes: flour, sugar, baking soda, salt, cinnamon, nutmeg, and ginger. Step 4 Wet Ingredients Add the rest of the ingredients (wet ingredients). This includes: vegetable oil, water, eggs, and pumpkin. Mix well. Step 5 Pour batter into pans Pour batter evenly into your four pans. Step 6 Stagger pans in the oven Stagger the pans in the oven instead of lining them up in a row. This allows the air to flow around them and they will bake evenly. Bake 50 - 60 minutes. Allow the bread to cool on a cooking rack before removing the bread from the pans. If you want to store the bread for a long time you can wrap the fresh, cooled loaf in aluminum foil and freeze it. You can freeze them for a few months… nice presents for the holidays!! It takes a couple of hours to thaw when it's removed from the freezer. It will still taste delicious! ENJOY! |
 |
